
To fix e-bike hydraulic disc brake rub, loosen the caliper bolts, squeeze the brake lever and hold it then re-tighten the bolts. That re-centers the caliper over the rotor. If it still rubs, check the wheel seating then true a bent rotor or clean the pads. Most fixes take 10 to 20 minutes.
You know the sound. That faint shh-shh-shh every time the wheel turns, getting louder the second you stop pedaling. It's annoying it drags on your motor and it wears out your pads faster than they should. The good news is that you can fix it yourself with a few basic tools, and you probably already own most of them.
First, What's Causing Your Brake Rub?
Listen before you touch anything, because the sound tells you what to fix. Lift the wheel, spin it, and match what you hear:
| What you hear | Likely cause | Go to |
|---|---|---|
| Steady rub the whole way round | Caliper off-center | Step 3 |
| A tick or scrape once per wheel turn | Bent rotor | Step 5 |
| Rub started after taking the wheel off | Wheel not seated, or pistons pushed out | Steps 1 and 4 |
| Only one pad drags | Sticky piston | Step 4 |
| Squeal plus weak braking | Contaminated pads | Step 6 |
Tools and Materials You Need to Fix Brake Rub
Most rub fixes need only a hex key set, a clean rag, and isopropyl alcohol. A 4 or 5 mm hex key fits most caliper bolts.
- Hex keys (4 mm and 5 mm) and a Torx T25 key
- Clean rag and isopropyl alcohol (90% or higher)
- Optional: a rotor truing fork (a small tool that costs less than a pizza night out)
- Optional: a piston press or a clean plastic tire lever
- Optional: a torque wrench
- Replacement pads only if yours are oily or worn
Please note: Never use metal tools (like a screwdriver) directly against the brake pistons as they can easily crack or scratch them. Always use a plastic tire lever or leave the old pads in place if you must use a metal tool to push them back.
Step 1: Check That the Wheel Is Fully Seated
Press the wheel firmly into the dropouts and re-tighten the axle since this alone fixes a surprising number of rubs. If the axle isn't fully seated the rotor sits slightly off to one side.
- Loosen the thru-axle or quick-release.
- Push down on the bike (or the saddle) so the axle drops fully into the dropouts.
- Tighten the axle back up.
- Spin the wheel and listen.
On a hub-motor e-bike, also check that the axle nuts and torque arm are tight.
Step 2: Make Sure the Rotor Is Tight
A loose rotor can wobble and rub, so check its bolts before adjusting the caliper. Give each rotor bolt a gentle check with a Torx T25. If your rotor uses a Center Lock lockring make sure it's snug. Follow the torque number in your hub or rotor manual.
Step 3: Re-Center the Caliper
Loosen the two caliper bolts a little, squeeze the brake lever and hold it, then tighten the bolts while you're still squeezing. The clamped pads pull the caliper into line with the rotor. This is the fix that works most often.
- Loosen both caliper bolts one or two turns, just enough for the caliper to shift.
- Squeeze the lever hard and hold it.
- Snug each bolt a little at a time, alternating between them. Let go of the lever, spin the wheel and listen.
- Still a faint rub? Loosen the bolts again, nudge the caliper toward the side with more space, and re-tighten.
A slip of paper or a business card beside the rotor helps you judge the gap. For tightening, use the torque value printed on your caliper or in your brake manual. Many Shimano disc calipers list 6 to 8 N·m but check your own.
Step 4: Reset or Clean the Pistons
If one pad drags, or the rub started after you removed the wheel, push the pistons back evenly and clean around them. Hydraulic pistons can creep outward when the wheel is out, and dirt can make them stick.
- Remove the wheel and the brake pads.
- Wipe around the exposed pistons with a rag and isopropyl alcohol.
- Gently press the pistons back using a piston press or a clean plastic tire lever.
- Refit the pads and wheel, pump the lever a few times until it feels firm, then repeat Step 3.
Never use oil-based lube near the pads or rotor. If a piston still won't move freely, the caliper may need servicing.
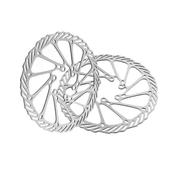
Step 5: Straighten a Bent Rotor
If you hear a tick once per wheel turn, find the spot where the rotor touches the pad and flex it back, a little at a time. Go slowly, because it's easy to overbend.
- Spin the wheel and watch for the exact spot where the rotor grazes a pad.
- Fit a rotor truing fork (or a small adjustable wrench wrapped in cloth) at that spot.
- Make a tiny bend, then spin and recheck.
- Repeat until the rotor runs straight.
If the rotor has several rub points, is cracked, or is badly bent, replace it. Shimano lists 1.5 mm as the minimum rotor thickness and says to stop using a rotor once the aluminum shows through. Shimano's service instructions call for replacing the rotor at 1.5 mm or when aluminum is visible and say pads should be at least 0.5 mm thick before you ride. Other brands set slightly different limits, so check your rotor's stamp and manual.
Step 6: Clean or Replace Contaminated Pads
If your pads look shiny, glazed or oily replace them because soaked pads can't be cleaned reliably. Wipe the rotor with isopropyl alcohol and a clean rag. After fitting new pads, bed them in: from a moderate speed brake firmly several times without locking the wheel.
Step 7: Spin, Test, and Ride Gently
Spin the wheel, squeeze the lever a few times, then take a short slow ride to confirm the rub is gone. The wheel should spin freely and quietly, and the lever should feel firm. If the lever feels spongy, pulls to the bar, or you see fluid, stop here. That points to air or a leak in the hydraulic system, and it's time for a proper bleed or a professional.
Quick Prevention Habits
A few minutes a month keeps the rub from coming back.
- Check caliper bolts for tightness.
- Inspect rotor bolts regularly.
- Monitor pad thickness for wear.
- Keep chain lube away from brakes.
- Avoid overspraying chemicals near rotors.
When to visit a mechanic?
Go to a mechanic immediately if you experience any of these five critical issues:
- Spongy Lever: Squeezing the brake lever feels mushy or it pulls all the way to your handlebar grips.
- Fluid Leak: Active hydraulic fluid is seeping or dripping around your brake levers, hoses, or caliper seals.
- Seized Pistons: A piston remains completely stuck or moves unevenly even after cleaning it with isopropyl alcohol.
- Severe Rotor Damage: The rotor is cracked, deeply gouged, or worn down below the 1.5 mm minimum thickness limit.
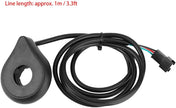
- Motor Sensor Error: The electronic motor cut-off wires extending from the brake assembly are physically damaged or throwing error codes.
Get Professional E-Bike Brake Support from E-Movement UK
If your e-bike is experiencing persistent braking problems, E-Movement UK can help. Our experienced team provides professional e-bike servicing and repair support including hydraulic brake inspections, component checks, and electrical troubleshooting. Whether you are dealing with leaking brake fluid, seized caliper pistons, damaged rotors or electronic brake sensor faults, professional inspection can help identify the problem and prevent further damage.
Visit E-Movement UK at Orchard Business Park, Forsyth Road, Woking, GU21 5SB, or contact our team to arrange a service appointment.
Frequently Asked Questions
Why do my brakes rub right after I put the wheel back on?
The wheel is likely slightly crooked in the frame or the hydraulic pistons crept outward while the wheel was out. Loosen the axle, push the wheel firmly into the dropouts, and clamp it down tightly.
Why is only one brake pad rubbing against the rotor?
This points to either a misaligned brake caliper or a sticky piston that is failing to retract. Clean around the pistons with isopropyl alcohol, reset them with a plastic tool, and re-center the caliper.
Can I use WD-40 or chain lube to stop the brake noise?
Absolutely not. Standard lubricants will permanently contaminate your brake pads and rotor, ruining your stopping power. Use only 90% or higher isopropyl alcohol to clean brake components.
How do I know if my e-bike brake rotor is bent?
Spin the wheel and listen carefully. If you hear a recurring "tick" or scrape at the exact same spot during every single rotation, your rotor is bent and needs to be gently flexed straight.
When should I replace my e-bike brake pads and rotors?
Replace your pads immediately if the braking material wears down to less than 0.5 mm or becomes contaminated with oil. Replace the rotor if it cracks or drops below 1.5 mm in thickness.
Need a Professional Fix? We’ve Got You Covered!
If your e-bike requires a hydraulic system bleed, sensor repair, or advanced mechanical tuning, leave it to the experts.
Visit E-Movement UK at Orchard Business Park, Forsyth Road, Woking, GU21 5SB or contact our team today to arrange a service appointment.
For quick drop-in customer service and workshop repairs, you can also stop by our Woking storefront at 12 The Broadway, Woking, GU21 5AP.