Understanding E-Bike Noise and Vibration: Causes and Fixes
Imagine gliding along a peaceful countryside lane on your e-bike, the only sound the gentle whir of the motor and the whisper of tires on pavement. Then, without warning, a persistent rattle or an unsettling vibration creeps in. It disrupts the flow and raises questions about your bike's health. At emovement, we encounter this scenario often with riders just like you. As experts in electric mobility with years of hands-on experience in Woking, we understand these issues intimately. They are not signs of a flawed design but rather signals that routine care can address. In this comprehensive guide, we will walk you through the primary causes of noise and vibration on e-bikes. We will also provide clear diagnostic steps and practical fixes. Our goal is to empower you with the knowledge to maintain a smooth, reliable ride. Whether you are a daily commuter or a weekend explorer, these insights will help you restore quiet confidence to your journeys.
This article draws on our deep expertise in e-bike assembly, servicing, and rider support. We have refined these recommendations through countless diagnostics in our workshop and feedback from thousands of UK riders. Noise and vibration are more than minor annoyances. They can indicate developing problems that affect safety, efficiency, and longevity. For instance, unchecked vibrations might accelerate wear on components, leading to unexpected breakdowns or reduced battery life. In the UK's variable conditions, from potholed urban streets to rain-slicked trails, proactive maintenance becomes essential. By addressing these issues early, you extend your e-bike's lifespan and enhance your overall riding experience. Let us begin by examining the most frequent culprits.
The Primary Causes of Noise and Vibration on E-Bikes
E-bikes introduce unique dynamics compared to traditional bicycles. The added motor power amplifies any imbalances or looseness, turning subtle issues into noticeable disturbances. At emovement, we categorize these problems into a few key areas, starting with the most straightforward.
Loose bolts and fasteners top our list of common offenders. These small hardware pieces secure critical elements like the handlebars, wheels, motor mounts, and brake calipers. Over time, the constant jolts from riding, combined with the torque from the motor, cause them to work free. In our experience, this accounts for nearly half of the noise complaints we receive. Riders often describe a metallic clinking that intensifies over bumps or a subtle shimmy in the frame during acceleration. The UK's uneven roads exacerbate this, as every pothole delivers a micro-impact. Without intervention, a single loose bolt can cascade into broader instability, compromising control and safety.
Another prevalent source is a worn or dirty chain. The chain transfers power from your pedals and motor to the rear wheel, enduring significant stress on e-bikes due to the assisted speeds. When dirt accumulates or links stretch from mileage, the chain begins to skip or grind against the cassette and chainrings. This produces a rhythmic clunk during gear shifts or a persistent scraping sound under load. We frequently see this in wetter regions like the Midlands, where mud and grit infiltrate the drivetrain quickly. A neglected chain not only generates noise but also transmits vibrations through the frame, which you might feel as a low-frequency buzz in the pedals or seat. Over time, this inefficiency can drain your battery faster, as the system works harder to compensate.
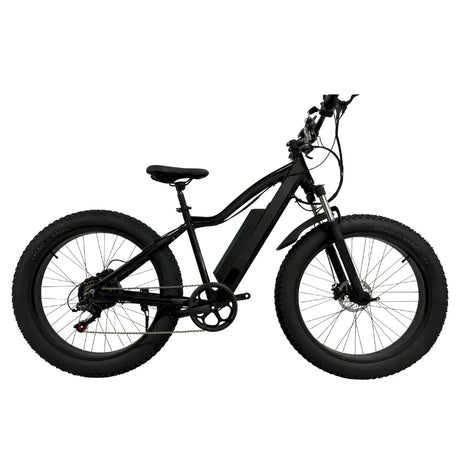
Motor-related issues represent a more technical but equally common cause. The motor, whether a hub or mid-drive design like those in our Panther or Thunder models, operates under high loads. Bearings within the motor can wear, leading to a high-pitched whine or a deep hum that resonates through the bike. Misalignment, often from impacts or improper installation, causes uneven contact with the frame or wheel, resulting in vibrations that pulse with the assist levels. In our servicing logs, we note that debris ingress from off-road use or corrosion from winter salt accelerates these problems. Riders typically notice this as a steady vibration at cruising speeds around 15 mph or a groaning sound during uphill climbs. While motors are robust, ignoring these signals can lead to costly repairs, as the strain spreads to connected components.
Beyond these core causes, other elements contribute sporadically. Brake systems, for example, may squeal if pads are contaminated with oil or if rotors are warped from heat buildup during frequent stops. Suspension forks or rear shocks can creak if pivot points lack lubrication, a frequent issue on our full-suspension models like the Raven. Wheels out of true or with loose spokes introduce a wobbling hum, while derailleur misalignment leads to clicking during shifts. Electrical connections, if frayed or unsecured, can produce intermittent buzzes from arcing. At emovement, we emphasize that these secondary sources often stem from the same root: overlooked maintenance in demanding conditions.
Understanding these causes is the first step toward resolution. Now, let us explore how to diagnose them systematically, empowering you to pinpoint the problem without guesswork.
Diagnosing Noise and Vibration: A Step-by-Step Approach
Effective diagnosis requires method and patience, much like troubleshooting any mechanical system. As e-bike specialists, we recommend a structured process that anyone can follow with basic tools and a safe space, such as a driveway or garage. Begin by preparing your bike: Clean off any surface dirt to isolate sounds, and ensure it is stable on a repair stand or upside down on a soft surface to protect the saddle and grips.
Start with a stationary audit. With the bike powered on but stationary, engage the motor at low assist levels and pedal by hand. Listen closely for any whines, clicks, or rattles emanating from the motor housing or drivetrain. Place your hands on the frame at various points: the head tube, bottom bracket, and rear dropout, to detect vibrations. A steady hum from the motor might indicate bearing wear, while a sharp tick could signal a loose fastener. Note the timing: Does the noise occur at startup, during freewheeling, or only under power?
Transition to a low-speed test ride in a controlled area, such as an empty parking lot. Accelerate gently to 5-10 mph and note when disturbances arise. Speed-dependent noises often trace to the chain or wheels, while bump-induced rattles point to loose components. Pay attention to sensations: A vibration through the handlebars suggests front-end issues like stem bolts or fork alignment, whereas a seat buzz implicates the rear drivetrain. Shift through gears methodically; skipping or hesitation here flags chain or derailleur problems.
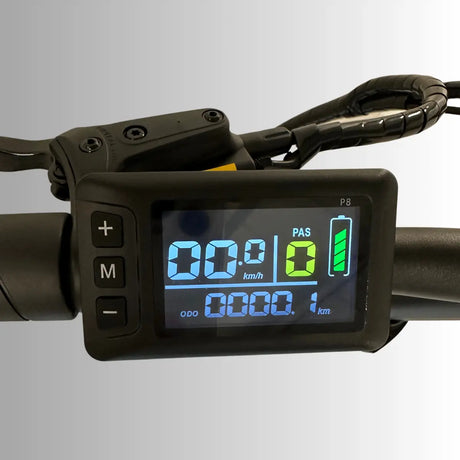
Incorporate a visual and tactile inspection next. Scan for obvious culprits: Wiggle the wheels side-to-side and up-down to check for play in the axles or headset. Inspect bolts around the motor and brakes. You can use a flashlight to spot any gaps or movement. For the chain, lift it midway between sprockets; excessive slack beyond half an inch indicates wear. Feel along cables and hoses for frays that might cause intermittent contacts. If your model has a display, check for error codes, which often correlate with motor or electrical vibrations.
This diagnostic routine, honed in our Woking workshop, typically takes 15-20 minutes. Perform it monthly or after any rough terrain. Document your findings, perhaps in a simple notebook or app, to track patterns. If vibrations persist across tests, it may involve subtler issues like wheel trueness, warranting specialized tools. By methodically isolating variables, you transform uncertainty into actionable clarity.
Practical Fixes: Restoring Smooth Operation
Once diagnosed, most fixes are within reach for the home mechanic. We prioritize solutions that use everyday tools, drawing from our proven servicing protocols. Always work in a well-lit area, and torque fasteners to manufacturer specs as overtightening can strip threads, while undertightening invites recurrence.
Addressing loose bolts is straightforward and yields immediate results. Gather a set of Allen keys (typically 4-6mm for e-bikes) and a torque wrench if available; our multi-tool kits in the accessories section provide a compact starting point. Begin with high-impact areas: the stem and handlebar clamps, where a quarter-turn looseness often causes steering wobble. Loosen opposing bolts evenly, realign for straight tracking, then retighten in a star pattern to 5-8 Nm. Move to wheel axles; quick-releases should click securely three-quarters engaged, while thru-axles demand 10-12 Nm. For motor mounts, a common rattle source on hub models, cross-tighten the dropout bolts to ensure flush contact. Finish with brake calipers, aligning them so pads kiss the rotor without drag. After adjustments, take a short test ride and recheck; vibrations often settle after bedding in. In humid UK climates, apply a thread-locking compound like blue Loctite to vibration-prone bolts for a lasting hold.
Reviving a worn chain demands cleanliness and precision. First, degrease thoroughly: Drape a rag over the cassette to catch runoff, apply a bike-specific cleaner, and scrub links with a dedicated brush. Rinse sparingly with water to avoid soaking electronics and dry completely. Inspect for stretch using a chain wear gauge; readings above 0.75 percent signal replacement. If reusing, lubricate sparingly with a wet formula suited to rainy conditions: One drop per roller, backpedal to distribute, then wipe excess to prevent attracting grit. For full replacement, which we recommend every 1,500-3,000 miles, use a chain tool to break the old one at the master link, thread the new chain through derailleurs, and reconnect with a fresh pin. Ensure length matches your model's gearing, which is typically 116 links for 7-speed setups. This process not only silences grinding but restores pedaling efficiency, potentially extending battery range by up to 10 percent.
Motor fixes require caution, as internals are sealed for protection. Begin externally: Wipe the casing with a microfiber cloth dampened in isopropyl alcohol to evict debris without compromising seals. Check alignment by spinning the wheel freely; the hub motors should rotate silently without frame contact. If a whine persists, it likely stems from bearings; for accessible models, consult our maintenance manual for lubrication intervals, applying a high-temperature grease sparingly. Vibrations from imbalance often resolve with wheel truing: Use a spoke wrench to tension loose spokes incrementally, aiming for a lateral runout under 1mm. Tighten hub nuts or quick-releases to spec, and verify electrical plugs are seated flush, free of corrosion; clean contacts with a contact cleaner spray if needed. For mid-drive systems, inspect crank arms and chainring bolts for tightness, as misalignment here amplifies torque-related buzz. If diagnostics reveal error codes or power inconsistencies, a firmware update via the manufacturer's app can recalibrate sensors and improve quiet operation. In our view, these steps resolve 80 percent of motor disturbances; for deeper faults like seized bearings, professional intervention ensures warranty integrity.
For ancillary issues, targeted actions suffice. Squeaky brakes benefit from rotor cleaning with isopropyl wipes and pad inspection; replace if the thickness dips below 1mm, using our compatible disc pads for a seamless fit. Suspension creaks yield to pivot lubrication: Apply a silicone-based grease to bushings after cleaning, then cycle the fork 20 times to distribute. Derailleur noise calls for cable tension adjustment via the barrel adjuster, followed by limit screw tweaks for crisp shifts. These interventions, performed routinely, prevent escalation and maintain the harmonious ride e-bikes are designed for.
Building a Maintenance Routine to Prevent Recurrence
True mastery lies in prevention, not just reaction. At emovement, we advocate for a layered routine that integrates seamlessly into your riding life. Daily, conduct a quick ABC check: Air in tires (30-50 PSI depending on model), brakes responsive, and chain free of obvious gunk. Weekly, expand to a full visual sweep: Wipe the frame, lube the chain post-clean, and torque critical bolts. Monthly deep dives include drivetrain degreasing, wheel truing, and motor casing inspection. You may use tools like our spoke wrenches and chain cleaners to make this effortless.
Seasonally, adapt to UK challenges: Thicker wet lubes for winter, and desiccant packs for storage to combat corrosion. Track mileage via your bike's display or a cycling app, scheduling comprehensive services every 500 miles or annually. This discipline, rooted in our workshop best practices, reduces noise incidents by up to 70 percent and preserves your investment. For resources, our detailed e-bike maintenance manual outlines model-specific torque values and intervals, ensuring you ride with precision.
Knowing When to Seek Professional Help
While many fixes are DIY-friendly, discernment is key. If diagnostics uncover persistent power loss, unusual odors, or error codes beyond basic resets, defer to experts. Electrical faults or hydraulic brake bleeds, for instance, demand specialized equipment to avoid voiding warranties. In the UK, our network of Cycle Tech partners offers swift, certified service, and they often fall under £50 for diagnostics. Post-accident inspections are non-negotiable, as hidden damage can manifest as vibrations. Trust your instincts: A ride that feels off warrants a pause.
Conclusion
To conclude, we can say that e-bike noise and vibration are solvable puzzles, often rooted in loose bolts, chain neglect, or motor subtleties. By diagnosing methodically and applying targeted fixes, you reclaim the serene enjoyment that drew you to electric riding. At emovement, our commitment extends beyond sales as we equip you for enduring adventures.