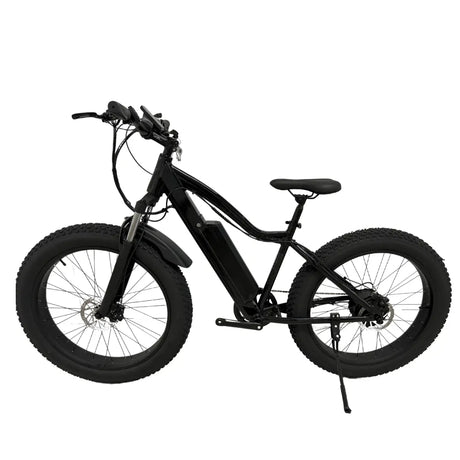
Battery Connectors Explained: Choosing & Replacing Plugs
You’ve got your e-bike ready, you plug in your charger… and suddenly realise the connector doesn’t match, or it’s wobbly, or the pins look worn.
This sounds annoying, right? Believe us, when you experience it, the level of annoyance you feel would be much higher. At emovement, we believe that one of the most overlooked parts of your electric bike’s system is the humble battery connector. In this guide, we’ll walk you through: what connector types you’ll likely encounter, how to check compatibility, how to replace plugs safely, and how to avoid nasty issues down the line.
Consider this your go-to plug-and-play checklist.
Why Battery Connectors Matter
Think of the connector between your battery and bike as the “gateway” for all the power, signals, and safety systems. A poor connector = higher resistance = heat, voltage drop, inefficiency. Worse: loose or damaged connectors can lead to mis-starts, error codes, even risks like short circuits or fire. That’s not just theory: the right plug makes a big difference in reliability and rider peace of mind.
When you buy an e-bike from emovement or battery/charger accessories from us, we expect that the connector will be properly matched, robust, and safe. So below we’ll walk you through what to look for.
1. Common Connector Types & What They Mean
Let’s cut to the chase. These are the types you’re likely to see:
-
Anderson Powerpole (and similar)
These plugs are heavy-duty, modular, and often genderless, so you don’t have to worry about “male/female”. Great for high current applications, especially if you’re running a powerful motor or large battery pack. They offer robust contacts and are used widely in the e-bike world.
-
XT60 / XT90 (Bullet-style)
You’ll see these especially with higher current packs. “XT60” means roughly 60 A rating, “XT90” 90 A plus. These plugs have tight-fit bullet contacts, gold-plated sometimes, to keep resistance low and connection tight. This is particularly useful if you’ve got a performance setup.
-
DC Barrel / XLR / Proprietary Connectors
Lower current or more compact packs often use barrel-type connectors or 3-pin XLR-style plugs. Then you have manufacturer-specific plugs (proprietary) – if your bike is from a major brand with sealed battery packs, you may not have “generic” connector options.
Knowing what style you’ve got is half the battle. It saves you from ordering the wrong part, ensures compatibility, and keeps things safe.
2. Compatibility Issues to Watch For
When you decide to replace or upgrade connectors, here are the key compatibility checks:
-
Voltage & Current Rating: Just because a plug fits physically doesn’t mean it’s rated for your setup. If your battery is 48 V and your system draws 30 A, you need a plug rated for that or more.
-
Polarity & Gender: Make sure the positive and negative contacts are correct. Plugging them incorrectly can damage electronics. Reinforced plugs or gender-neutral designs reduce risk.
-
Brand/Proprietary Systems: Some e-bikes have unique sealed plugs for warranty or safety reasons. If you open these up, you might void the warranty. Always check with us at emovement or your manufacturer if you’re unsure.
-
Physical Fit & Locking Mechanism: A loose plug can vibrate out, lose contact, get hot, or corrode. Look for plugs that click, lock, or have secure retention.
-
Environment & Sealing: If you ride in rain, mud, or off-road, consider connectors with higher ingress protection (IP) ratings. Moisture and grit are enemies of electrical contacts.
-
Future Upgrades: If you might upgrade the current later (bigger motor, bigger pack), it’s wise to choose connectors now that give you headroom rather than just minimal spec.
At emovement, we stock a range of connectors and cables built for UK e-bike environments. You may contact us to get more details about this.
3. How to Replace a Battery Connector: Step-by-Step
If you’re comfortable with DIY and basic electrical work (and you’re confident it won’t invalidate your warranty), you can replace the plug yourself. Here’s how we recommend you do it safely:
Materials you’ll need
-
The correct replacement plug rated for your voltage/current.
-
Suitable cable (same cross-section/conductor size as original).
-
Crimping tool (or soldering if the plug requires it) and heat-shrink.
-
Multimeter for continuity/voltage testing.
-
Cable ties / protective sleeving for neat routing.
Procedure
-
Disconnect the battery and power off the system. Make sure no voltage is present.
-
Remove the old plug: cut the cable a little back so you have a fresh conductor. Note the wiring colours/polarities.
-
Prepare the new plug: strip the cable to the correct length, install the contacts (crimp or solder as specified), insert into the housing, and ensure everything is secure.
-
Insulate properly: shrink-tubing, sleeving, or boots if available. This protects against moisture and wear.
-
Reconnect: plug into the battery/charger and ensure a snug fit.
-
Test: Use the multimeter to confirm the correct voltage and no short circuits. Turn on the bike and check that everything works, including the display, motor assist, etc.
-
Secure wiring: Use cable ties to avoid routing through sharp edges or high-vibration zones.
-
Final check: After a short ride, feel the plug area. If it’s hot, wobbly, or there’s a spark when plugging in, stop immediately and inspect.
We have a selection of compatible plugs and cables ready at emovement. Just get in touch and our experts will guide you.
4. Safety Warnings & Best Practices
There is one thing we all need to understand: messing with battery connectors isn’t trivial. Here are the safety must-knows:
-
Never plug or unplug under load (motor running or battery live) as this poses a risk of arcing or damage.
-
If you spot melted insulation, green or white corrosion, loose contacts, or frequent disconnections, you should stop using the connector until it’s replaced.
-
Avoid cheap “one-size-fits-all” connectors that are underspecified. They might save money now, but cost you in reliability or safety later.
-
Always match the specification (voltage and current), not just the plug shape.
-
Keep connectors dry and clean. After riding in rain or mud, disconnect (if practical), dry the plug, and inspect for grit.
-
If the battery or plug ever emits heat, smell of burning, or shows scorch marks, you should stop use and contact us immediately.
-
Modifying sealed battery packs or brand-specific plugs may void warranty. If your bike is under warranty, check with us at emovement before proceeding.
Following these safety rules ensures your ride stays reliable and safe.
5. When & Why You Should Upgrade Your Connector
Sometimes replacing the plug is about fixing, sometimes it’s about upgrading. Here are scenarios where an upgrade makes sense:
-
You’re upsizing the system (bigger battery or more powerful motor), so current demand increases.
-
Your existing connector is repeatedly hot/loose/vibrating. This means that it is time for an upgrade to a higher spec plug, which gives better reliability.
-
You want better weather sealing for all-weather riding.
-
You’re using third-party batteries or charger cables and want a standard connector for interchangeability.
-
You’re prepping for future modular battery packs and want a universal connector format.
At emovement, we can help you select the right connector for the job. You just have to talk to us about compatible high-current plugs, crimp vs. solder options, and bespoke wiring harnesses.
Final Word
At emovement we want you to ride without worry. Choosing the right connector and replacing it properly is one of the unsung keys to e-bike reliability. Don’t ignore the plug as it’s not glamorous, but it matters. Match the spec, keep it clean, secure the wiring, and you’ll head off more headaches than most riders ever think about.
If you’re unsure, want a connector upgrade, or need help diagnosing a loose or failed connection, drop by our website or bring the bike in. We’ll get you back on the road, seamlessly.